
WHAT IS CULINARY ARTS VS CULINARY SCHOOL?
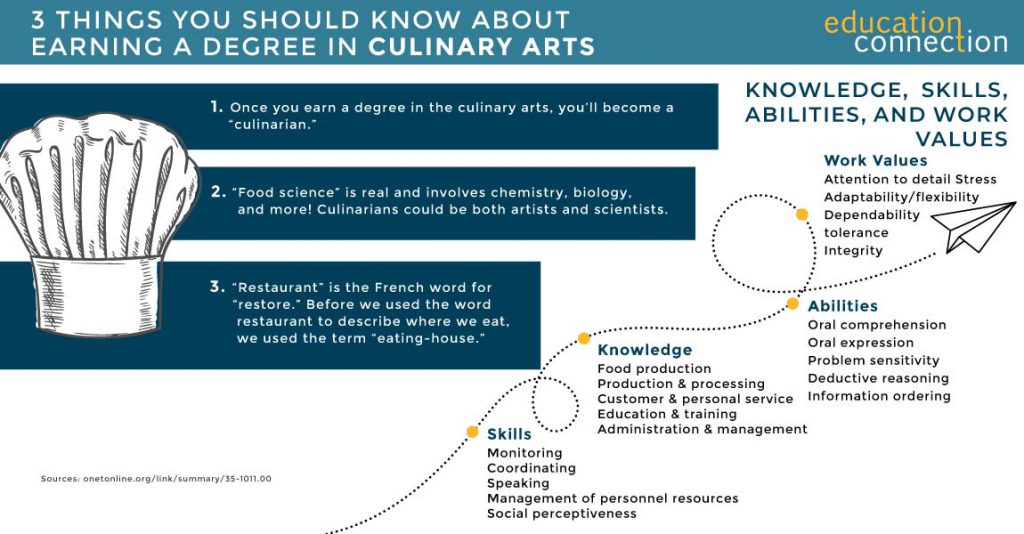
The word “culinary” means “related to cooking.” The culinary arts include the skills of preparing, cooking, and presenting food. People who are culinary artists know how to create tasty, beautiful, quality dishes.
With online culinary schools, people learn how to work as culinary artists. They study the basics of baking, cooking, food safety, developing menus, and controlling costs. They also learn how to manage food businesses as chefs, managers, or owners of restaurants. Culinary schools combine the art of making great food with the craft of running a good business.
Through culinary school, students may learn how to work as a:
- Restaurant manager
- Wine director
- Executive chef
- Personal chef
- Head chef
- Head cook
- Pastry chef
Culinary artists could also own a variety of businesses. Food trucks, restaurants, or food service companies, for example. They may also write cookbooks and teach classes, or work as freelance personal chefs. There are lots of possible options.
ONLINE CULINARY SCHOOL
Culinary arts programs include classes and labs, some online and some in person. Classes teach theory and concepts. In their labs, students put what they have learned to practice. In some online culinary programs, students do internships to grow and gain experience. In some programs, students might take culinary arts classes with Gen Ed classes. Online culinary classes may need students to prove their techniques through virtual means. Or online students might have to visit campus for exams or labs.
Many culinary arts programs may differ from one another. But, there are core classes. Students study the basics of nutrition and combining foods. They learn how to design menus and pair foods with wines. And they see how to work in kitchens and with computer software the industry uses.
Beyond core classes, students take classes that give them focused knowledge. This is where programs start to differ. In some cases, students focus more on management or food operations. In others, they study the basics of the arts in greater depth. They might focus more on fine dining or food services. Or they might learn more about being chefs, bakers, or nutrition-focused chefs. It depends on the program.

Southern New Hampshire University
- Take advantage of some of the nation’s most affordable tuition rates, while earning a degree from a private, nonprofit, NEASC accredited university
- Qualified students with 2.5 GPA and up may receive up to $20K in grants & scholarships
- Multiple term start dates throughout the year. 24/7 online classroom access.
Popular Online Programs
Business Administration, Psychology, Information Technology, Human Services…

Western Governors University
- Award-winning programs created to help you succeed.
- A quality education doesn’t have to be expensive. Earn an accredited degree for less.
- Programs started monthly – Apply free this week!
Sallie Mae® Student Loans
- For bachelor’s and associate’s degrees or a certificate at a degree granting school
- Multiple repayment options
- Competitive interest rates
- 95% approval rate when they return to Sallie Mae® with a cosigner1
- 4 months of free Chegg Study®2
Loan Options Include:
Undergraduate, Career training, Parent, MBA and more.

HOW LONG DOES CULINARY SCHOOL TAKE?
Culinary schools take one to four years, but varies by the online culinary degree program. People can earn an associate’s degree in the culinary arts in one and a half to two years. They can earn a bachelor’s degree in the culinary arts in four years. This is with full time attendance. Students who need to attend school part-time will take longer to earn a degree.


CULINARY ARTS SCHOOLS PROGRAM EXAMPLES
| School | # of Credits Required | Start Dates | Minimum Months to Complete |
|---|---|---|---|
| Culinary Institute of America | 69 | Summer, Spring and Fall | 18 |
| Lakeland Community College | 105 | Spring, Summer and Fall | 18 |
| Johnson & Wales University, Providence | 182.5 | Multiple Start Dates | 48 |
THE COST OF EARNING A CULINARY ARTS DEGREE
In 2021, median in-state tuition at a public school cost $3,917. Median out-of-state tuition at a private school cost $15,300.
| School | # of Credits Required | Cost Per Credit | Average Annual Cost |
|---|---|---|---|
| Culinary Institute of America | 69 | $438 | $32,800 |
| Johnson & Wales University, Providence | 182.5 | $202 | $35,750 |
| Lake Land College | 105 | $724.47 | $132,216 |
TOP CULINARY ARTS SCHOOL
Last check, there were many schools that offer culinary arts degrees or programs. From those schools, there were 9,052 culinary arts degrees awarded to students. The majority (96.5%!) of these degrees were associate’s degrees.
| Schools | 2021 Grads Total/Degrees Awarded | Average Annual cost |
|---|---|---|
| Culinary Institute of America | 479 | $32,800 |
| Johnson & Wales University-Providence | 202 | $35,750 |
| Lake Land College | 25 | $12,941 |
| Auguste Escoffier School of Culinary Arts-Boulder | 1,612 | $10,194 |
| The International Culinary Center | 344 | $48,635 |
CHOOSING AN ACCREDITED CULINARY ARTS DEGREE PROGRAM
Accreditation plays a vital role in ensuring the quality of courses and programs offered by schools. Attending an accredited institution assures that it has met stringent standards set by an external agency. Opting for an accredited school becomes crucial if you plan to pursue further education or transfer credits to another institution. Additionally, many employers prefer candidates who have attended accredited schools.
Most schools undergo two types of accreditation: one at the institutional level, signifying overall quality, and another at the program level, which may not always be necessary but serves as an added advantage. In the culinary arts field, accreditation is managed by the ACF (American Culinary Federation).
The ACF ensures that culinary arts programs maintain high-quality standards in their faculty, resources, and services. It’s possible to verify whether your school holds ACF accreditation by checking with the institution or directly with the ACF.
Furthermore, the ACF provides certifications that culinary professionals use to demonstrate their expertise to employers. These certifications cover various areas such as pastry and savory cooking, offering general or specific certifications at different proficiency levels. To qualify for certifications, individuals typically need a certain amount of professional experience, and those certified by the ACF must renew their certifications every three to five years.
OTHER CAREERS IN CULINARY ARTS
While there are many jobs for culinary artists, the following are some more common ones:
CHEFS AND HEAD COOKS
Chefs and head cooks oversee food preparation in various settings, managing staff and addressing food-related issues. In 2022, their mean annual wage stood at $56,520. Jobs in this field could experience a 5% growth rate, faster than the average.
FOOD SERVICE MANAGERS
Food service managers oversee the operations of restaurants and establishments serving food and beverages. They supervise staff, attend to customer experiences, and contribute to the profitability of the business. In 2022, the mean annual wage for food service managers was $61,310. Employment opportunities in this field are expected to remain relatively stable, with little to no change indicated (0%).